Are you planning to attend a baby shower and searching for the perfect gift? Or maybe you’re hosting and want to create a standout centerpiece? A diaper cake is a creative, practical choice that’s sure to impress—and it’s simpler to make than you might think. Keep reading for step-by-step instructions, tips on making a diaper cake, and plenty of diaper cake decoration ideas to spark your imagination.
What Is a Diaper Cake?
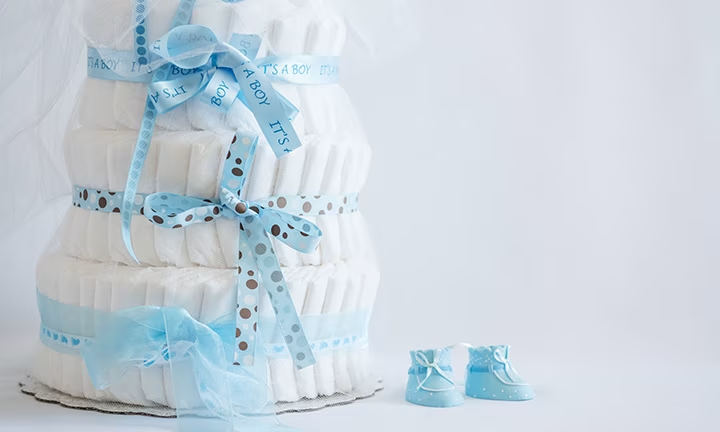
A diaper cake is a unique and thoughtful gift made entirely of diapers, arranged to look like a tiered cake. Often adorned with ribbons, baby essentials, and playful accents like paper cutouts or a cute “Oh, baby!” sign, it’s both eye-catching and functional. Whether used as a baby shower centerpiece or a memorable gift, a diaper cake is sure to stand out.
These creations can match the shower theme—imagine a jungle-themed diaper cake or a design inspired by the parent-to-be’s favorite colors or hobbies. For instance, you might add succulents for a modern touch or decorate it in the colors of a beloved sports team.
A diaper cake isn’t just for baby showers. It’s a great way to surprise a coworker before maternity leave or welcome a new arrival at a “sip and see” party.
No matter the occasion, a diaper cake is guaranteed to bring a smile to the parent-to-be. And with so many ways to personalize it, making one is just as enjoyable as giving it!
Diaper Cake Supplies
Creating a diaper cake with newborn diapers is easier than you might think! With just a few basic items, you can make a stunning gift or centerpiece that’s both adorable and practical. Here’s a list of the essential supplies for a diaper cake to get started:
Diapers: One or two packs of diapers are typically enough for a small or medium-sized diaper cake. If you’re going larger, you’ll need more. For example, the base tier might use 20 to 60 diapers, the second tier 10 to 40, and the top tier 5 to 20. These are just guidelines—you can adjust based on your vision.
Elastic rubber bands: You’ll need one large rubber band per tier and small bands for each diaper if you’re rolling them individually.
Decorative ribbon: This not only holds the diapers together but also adds a polished look.
Base: Choose a sturdy foundation like cardboard, a cake stand, a tray, or even a slice of wood for a rustic vibe.
Glue: While not mandatory, glue can help secure the ribbon and decorations.
Dowels: These are essential for stabilizing multiple tiers of your diaper cake.
Scissors: These always come in handy when you’re doing any DIY project.
Optional extras: Add small baby gifts (pacifiers, bibs, or toys) or craft items to enhance your design. Browse our diaper cake decoration ideas for more inspiration!
Wrapping material: Use cellophane or soft tulle to wrap your finished creation for a professional touch.
With these diaper cake supplies, you’re ready to create something truly special that the parent-to-be will love. Check out our tutorials below for step-by-step instructions and creative designs!
What Pampers’ Diapers to Use?
To make a great diaper cake, choosing the right diapers is key. Pampers offers several excellent options like Swaddlers, Pampers Pure Diapers, or Cruisers 360° Fit. These diapers are soft, durable, and perfect for this creative project.
Wondering what size of diapers for diaper cake works best? It’s entirely up to you! Larger diaper sizes can be easier to handle when building the cake but using a mix of sizes can make it more practical for the parents-to-be. For example, a single size keeps the cake level uniform, while different sizes for each tier add variety and give parents multiple options as their baby grows.
With Pampers’ quality diapers, your diaper cake is sure to be both functional and beautiful. Ready to start? Keep reading for step-by-step instructions!
How Many Diapers Do You Need to Make a Diaper Cake?
The number of diapers you’ll need depends on the size of the cake. A small diaper cake might require 25 to 30 diapers, while a larger one could use 60 or more.
Here’s a quick guide:
Base tier: 20 to 60 diapers
Second tier: 10 to 40 diapers
Third tier: 5 to 20 diapers
If you’re wondering how many diapers to make a diaper cake or whether there’s an exact number, it’s entirely flexible! Consider the size of your tiers and the overall look you’re going for. Larger diaper cakes may even include over 100 diapers, while a small diaper cake idea could involve fewer than 20.
Diaper Cake Decorating Ideas and Tutorials
Ready to take your diaper cake ideas to the next level? Whether you’re looking for a show-stopping centerpiece or a thoughtful gift, there are endless ways to personalize your creation. From classic designs to themed styles, we’ve got step-by-step diaper cake instructions and creative suggestions to inspire your own DIY diaper cake project.
Traditional Diaper Cake
Teddy Bear Diaper Cake
To create an adorable teddy bear diaper cake, perfect as a baby shower centerpiece or a thoughtful gift, you’ll need the following items:
Supplies:
60 Pampers Swaddlers diapers (size 1 or 2)
1 sturdy cardboard base (12-inch diameter or larger)
1 small teddy bear (for the topper)
Rubber bands (various sizes)
Wide ribbon (at least 1.5 inches thick)
Narrow decorative ribbon (optional for accents)
Baby accessories (pacifiers, bibs, socks, or small toys)
Wooden dowels or straws (for stabilization)
Hot glue gun (optional, for ribbon only)
Scissors
Wrapping material (tulle or cellophane)
Step 1
Create the Base Tier
Roll individual diapers tightly, graphics side inward, and secure each with a small rubber band.
Arrange 40 rolled diapers vertically in a circular shape on your cardboard base.
Secure the entire tier with an extra-large rubber band or wrap it tightly with a wide ribbon. Cover any visible rubber bands with decorative ribbon.
Insert two wooden dowels in the center of the tier to provide support for the upper layers.
Step 2
Build the Second Tier
Use 15 rolled diapers to create a smaller circle for the second tier.
Secure the tier with a large rubber band, as in Step 1, and cover with ribbon.
Slide the tier onto the wooden dowels to stabilize it.
Step 3
Add the Top Tier
Use 5 rolled diapers to form the smallest tier.
Secure this tier with a rubber band and decorate with ribbon.
Place it on top of the second tier, sliding it onto the dowels.
Step 4
Decorate the Diaper Cake
Wrap each tier with ribbon, adding bows or layered designs for a polished finish.
Tuck small baby accessories (like bibs, socks, or pacifiers) between the diapers to enhance the design.
Place the teddy bear on the top tier as the centerpiece. Secure it gently with double-sided tape or a soft ribbon to keep it stable without damaging the bear.
Step 5
Wrap and Finish
Wrap the entire diaper cake in tulle or cellophane to protect it during transport and add a professional touch.
Gather the wrapping material at the top, above the teddy bear, and secure it with a decorative ribbon.
Step 6
Optional Enhancements
Add floral decorations or greenery for a whimsical look.
Use themed ribbons to match the baby shower’s design (e.g., pastel colors, animal prints, or seasonal motifs).
And there you have it—a charming teddy bear diaper cake that’s both practical and adorable. Whether it’s a centerpiece or a gift, it’s sure to be a hit with parents-to-be!
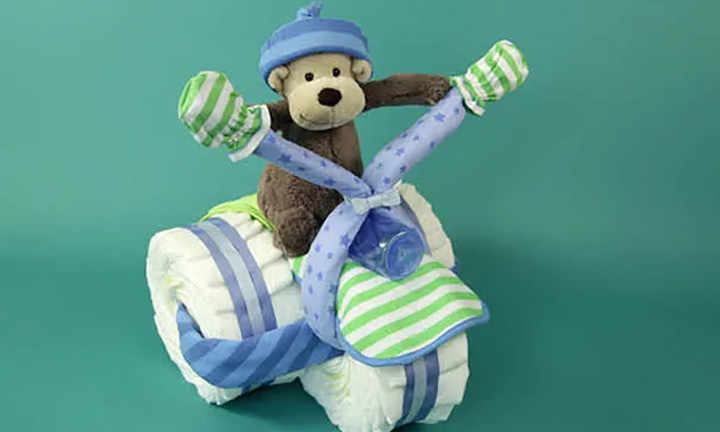
Motorcycle Diaper Cake
To make a motorcycle diaper cake, you’ll need:
72 Pampers Swaddlers diapers (size 1 or 2)
1 empty paper towel tube
1 8” cake pan
2 receiving blankets
2 bibs
1 baby bottle
1 pair of baby mittens or socks
Rubber bands
Ribbon (1.5” and optional 0.5” wide)
Decorative bows
Hot glue (optional, only for ribbon)
Step 1
Make the Wheels
Arrange 24 diapers in the cake pan, fanning them evenly into a spiral around the edge.
Place the paper towel tube in the center as a placeholder, and secure the diapers with a rubber band.
Carefully remove the wheel from the pan and set it aside. Repeat this process two more times to make three wheels, but skip the tube for the second and third wheels.
Step 2
Assemble the Wheels
Wrap a ribbon around each wheel to hide the rubber bands. Secure the ribbon ends with a small dot of hot glue—always avoiding the diapers.
Slide the paper towel tube through the center of two wheels to create the back wheels. Adjust so the roll hides inside the wheels.
Place the third wheel between the back wheels to form the front.
Step 3
Tie the Wheels Together
Fold a receiving blanket in half diagonally and roll it into a tube.
Thread the blanket through the paper towel tube and the front wheel, connecting all three wheels.
Tie the ends together with a rubber band and hide the band by rotating the blanket. Make sure to cover any visible parts of the paper towel roll with ribbon.
Step 4
Make the Seat
Roll one diaper, then wrap four more around it to create a small roll. Secure it with a rubber band and cover it with ribbon.
Place this roll between the back wheels to form the seat.
Drape a bib over the seat.
Step 5
Add the Front Fender and Headlight
Place the second bib on the front wheel as the fender.
Position the baby bottle (cap facing backward) on top to serve as the headlight.
Step 6
Create the Handlebars
Fold the second receiving blanket in half diagonally and roll it into a tube then secure the ends and middle with rubber bands.
Thread the blanket through the front wheel, leaving equal lengths on both sides pull the ends upward, and secure them over the bottle with a rubber band.
Adjust the ends to resemble handlebars and cover the rubber band with a decorative bow.
Slide mittens or socks onto the ends as handgrips.
Step 7
Add the Finishing Touches
Place a stuffed animal on the seat as the “rider.” Secure its hands to the handlebars with double-sided tape if needed. Add socks or mittens to fill any paper towel holes for a polished look.
And that’s it! Your diaper motorcycle (or diaper bike) is ready to wow the parent-to-be!
Princess Diaper Cake
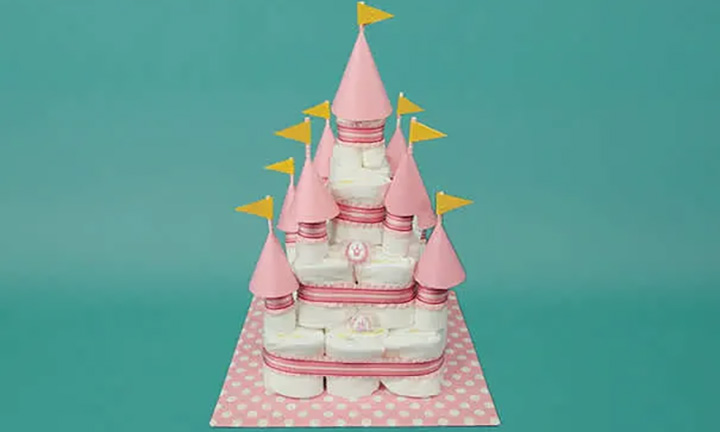
To create a magical princess diaper cake or diaper cake castle, you’ll need:
88 Pampers Swaddlers diapers (size 1 or 2)
16” cardboard cake board (wrapped)
Large rubber bands
Ribbon (wide and thin)
9 wooden skewers
9 colorful straws
Scrapbook paper and construction paper
Hot glue gun
Baby accessories (pacifiers, bibs, teething rings, etc.)
Step 1
Build the Base of the Castle
Fold 15 diapers in half (waistband inside) and stack them in alternating directions to create a row then secure them with a rubber band.
Repeat to make three rows of 15 diapers for the base layer.
Step 2
Create the Middle and Top Layers
For the middle layer, make two rows of 12 diapers.
For the top layer, create one row of 8 diapers.
Stack the rows in a pyramid shape on the wrapped cake board. Start with the 3 base rows, add the 2 middle rows, and finish with the top layer.
Tie a wide ribbon around each layer to hold the diapers together, then layer a thinner ribbon on top for decoration.
Step 3
Make the Turrets
Roll a diaper around a wooden skewer and secure it with a rubber band. Cover the band with a ribbon. Repeat to make 8 turrets.
For turret roofs, cut scrapbook paper into semi-circles, shape them into cones, and glue the edges. Remember to leave a hole at the top for a straw flag.
For the central turret, roll up 3 diapers, secure with a rubber band, and wrap with ribbon. Add a skewer in the center and top it with a larger paper cone.
Step 4
Add Flags and Final Touches
Cut out 9 diamond shapes from construction paper. Wrap each horizontally around a straw to create flags, and glue them closed.
Insert the straws into the turret roof holes so they stick out like flagpoles.
Step 5
Secure the Turrets
Carefully insert the bottom half of each skewer into the diaper structure to attach the turrets to the cake.
And there you have it—a beautiful princess diaper cake that’s perfect for a themed baby shower! This enchanting diaper cake castle is sure to delight the parents-to-be and become a stunning centerpiece.
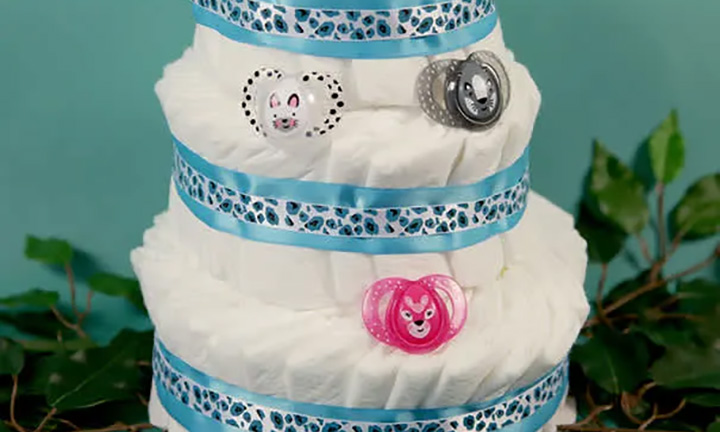
Jungle Diaper Cake
To make a jungle theme diaper cake or safari diaper cake, you’ll need:
102 Pampers Swaddlers diapers (size 1 or 2)
3 cake pans (10”, 8”, and 6”)
3 large rubber bands
Empty toilet paper rolls
Round cardboard cake base (at least 10”)
4 yards of ribbon
Baby accessories: washcloths, bibs, pacifiers, stuffed animals
Decorative artificial branches and leaves
Hot glue gun
Step 1
Create the Tiers
Place diapers into the largest (10”) cake pan, fanning them into a spiral. Add a toilet paper roll to the center and secure the diapers with a large rubber band.
Repeat with the 8” and 6” pans to make the middle and top tiers.
Step 2
Prepare the Base
Place the cardboard cake base on a flat surface.
Arrange artificial branches and leaves so they cascade over the edges. Hot glue the leaves in place and let them dry.
Step 3
Stack the Tiers
Remove the toilet paper rolls and carefully stack the diaper tiers from largest to smallest on the cake base.
Step 4
Decorate Your Cake
Wrap ribbon around each tier to cover the rubber bands and secure it with hot glue (be careful not to glue the diapers).
Add baby accessories like bibs, washcloths, and pacifiers inside the hollow center of the cake.
Step 5
Add the Finishing Touches
Place jungle or safari-themed stuffed animals around the cake, and tuck artificial leaves between the tiers for a wild, decorative look.
And that’s it! Your jungle theme diaper cake or safari diaper cake is complete. This adorable centerpiece is perfect for any jungle-themed baby shower.
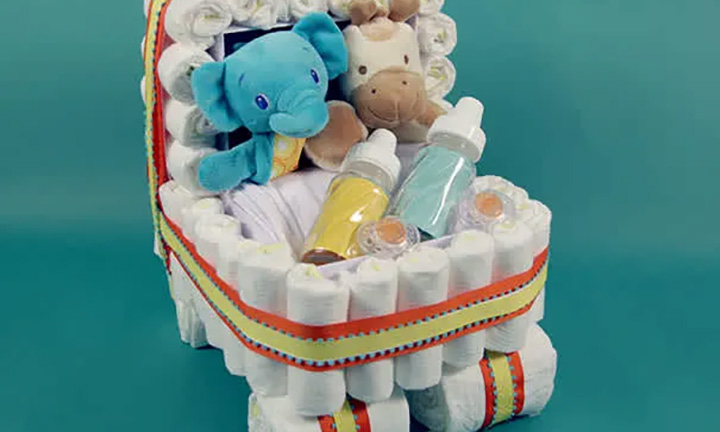
Stroller Diaper Cake
To make a stroller diaper cake, you’ll need:
61 Pampers Swaddlers diapers (size N or 1)
2 shoeboxes
1 roll of elastic
Ribbon or fabric
Rubber bands
Hot glue gun
Baby accessories (blankets, stuffed animals, bottles, pacifiers, etc.)
Step 1
Create the Stroller Base
Remove the lids from the shoeboxes. Cut 0.25” off the end of one box.
Place the trimmed box inside the other to form an “L” shape. Hot glue them together to keep them secure.
Wrap elastic loosely around the bottom box and glue the ends together. Let it dry.
Step 2
Add the Diapers
Roll each diaper tightly and secure it with a rubber band.
Slide the rolled diapers under the elastic, surrounding the bottom box.
For the canopy, wrap another elastic around the vertical box and roll more diapers to cover the top and sides. Stop where the two boxes meet.
Hide any visible elastic by tucking it between the vertical and lower diapers.
Step 3
Decorate With Ribbon
Wrap ribbon or fabric around the bottom and canopy of the diaper stroller to cover the elastic bands.
Layer different ribbons for extra style. Secure the ends with hot glue (avoiding the diapers).
Step 4
Make the Wheels
Roll 5 diapers together and secure them with a large rubber band to create a wheel.
Cover the rubber band with ribbon and secure it with hot glue.
Repeat to make 4 wheels.
Step 5
Add the Finishing Touches
Glue the wheels to the bottom of the stroller so the rolled edges face outward.
Fill the stroller with baby accessories like blankets, stuffed animals, bottles, and pacifiers.
And that’s it! Your stroller diaper cake is ready to impress. Whether it’s used as a gift or decoration, this adorable diaper carriage cake will surely be the talk of the baby shower!
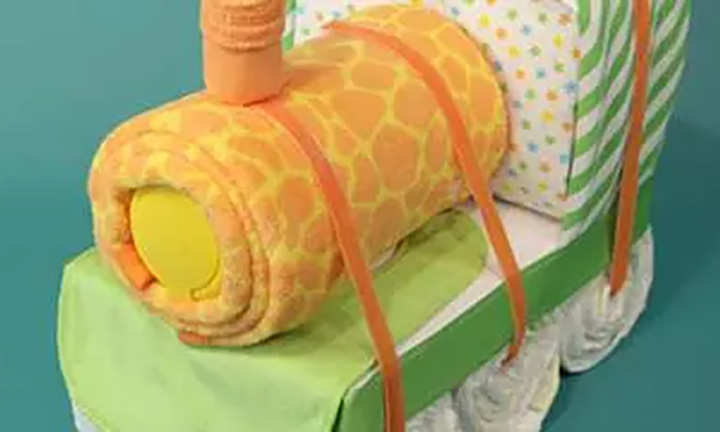
Train Diaper Cake
To make a train diaper cake, you’ll need:
106 Pampers diapers
3 long pieces of thin ribbon
6 pieces of wide ribbon (15.5” each)
2 fleece blankets
2 receiving blankets
Safety pins
1 bib
1 canister of wet wipes
1 pair of baby socks
Rubber bands
8.5” x 14” foam core
Teething rings or link toys
Baby accessories (bottles, pacifiers, stuffed animals, etc.)
Step 1
Create the Wheels
Roll one diaper tightly around a thin ribbon and secure it with a rubber band.
Roll seven more diapers around it to form one wheel and secure it with another rubber band.
Repeat to create six wheels in total. Cover each with a wide ribbon to hide the bands, securing the ribbon with hot glue (avoid gluing the diapers).
Step 2
Build the Train Cab
Stack 12 diapers, alternating the orientation (waistband in/out), and secure with a rubber band. Repeat to create two stacks.
Wrap a receiving blanket around the two stacks and secure it with safety pins. This will form the cab.
Place the cab on top of the wheels.
Step 3
Add the Train Base and Boiler
Lay out a fleece blanket with the inside facing up. Place the foam core in the center and fold the blanket over it, securing it with safety pins. This will be the training base.
Wrap the second fleece blanket around the wet wipes canister to create the boiler and secure it with pins. Place the boiler in front of the cab.
Step 4
Assemble the Train
Drape a bib over the front of the base as the train grill.
Use the thin ribbons from the wheels to connect the cab, boiler, and base by pulling them over the top and gluing the ends together.
Add a rolled diaper wrapped in baby socks to create the front light, and secure a teething ring as decoration.
Step 5
Make the Train Cars
Roll 21 diapers and secure each with a rubber band.
Wrap a 0.5” elastic band around a small box and slip the rolled diapers between the elastic and the box until fully covered.
Cover the elastic with ribbon and glue the ends together (avoiding glue on the diapers).
Add four wheels to each car using rolled diapers secured with rubber bands. Glue the ribbon from the wheels to the bottom of the box.
Fill the cars with baby accessories and connect them to the engine using link toys or teething rings.
Your diaper train is complete! This train diaper cake is not only a practical gift but also an adorable centerpiece for any baby shower.
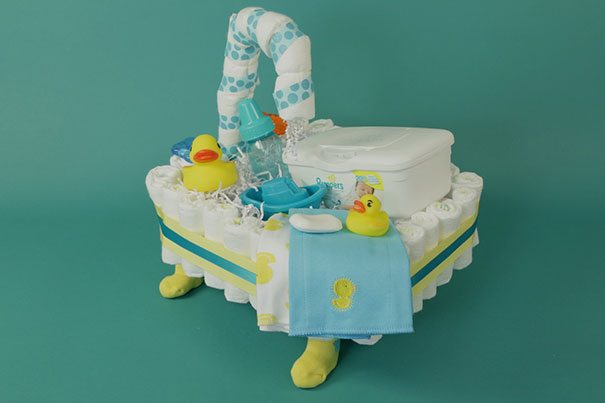
Bathtub Diaper Cake
To make a bathtub diaper cake, you’ll need:
52 Pampers diapers
Rubber bands
0.5” wide elastic band
1 cardboard box (12” x 9.5” x 3.5”)
Hot glue gun
2 pairs of baby socks
4 small jars of baby cream
1 wire hanger
Wire snips
Heavy-duty tape
Various lengths of ribbon
2 teething rings
Gift shred
Bath accessories (rubber ducks, bath products, washcloths, towels, etc.)
Step 1
Create the Base of the Tub
Roll 29 diapers tightly, graphics side up, and secure with rubber bands.
Wrap the elastic band around the box, gluing the ends together.
Insert the rolled diapers vertically under the elastic until the box is fully surrounded.
Step 2
Make the Faucet
Cut off the twisted portion of a wire hanger with wire snips and straighten it.
Fold the wire in half and tape the ends together. Bend it into a “J” shape.
Wrap diapers around the wire, securing each with a rubber band. Leave 4 inches of exposed wire at the bottom.
Step 3
Assemble the Tub’s Feet
Fill 4 baby socks with small jars of baby cream, leaving the tops exposed.
Glue the jars to the bottom corners of the box, ensuring the sock toes point outward to resemble claw feet.
Step 4
Combine the Elements
Insert the exposed wire of the faucet into the center of a diaper roll on the tub.
Wrap the ribbon around the faucet, spiraling it upward, and tuck the end into the spout. Glue the base of the ribbon to the box for stability.
Step 5
Decorate With Ribbon and Fill the Tub
Wrap a wide ribbon around the tub’s elastic band, then layer a thinner ribbon on top for contrast.
Line the inside of the tub with flat diapers to create a padded base. Add teething rings at the faucet base as tap handles.
Step 6
Add ‘Water’ and Finishing Touches
Cover the flat diapers with gift shreds to mimic water. Add some shreds to the spout for a running water effect.
Fill the tub with bath-themed items like rubber ducks, bath products, washcloths, and towels.
Your diaper cake bathtub is complete!
Jeep Diaper Cake
To create a Jeep diaper cake, you’ll need:
Cardboard box
Scissors (mixed media)
Safety pins
Felt
Glue and glue gun
Ribbon
Tape and duct tape
4 rubber bands
36-pack newborn diapers
4 baby bottles
4 receiving blankets
Teething tablets and cold tablets
Additional baby products (for cargo)
Step 1
Prepare the Box
Measure 6 inches from the bottom of a rectangular cardboard box and cut the top off.
Cut two strips for Jeep rails and remove the front side of the box.
Step 2
Wrap the Box
Use a receiving blanket to wrap the box, securing it with safety pins.
Fold a second blanket and wrap it around the front to form the Jeep hood.
Step 3
Make the Tires
Use 7 diapers per tire. Stagger 5 diapers, roll them tightly, and secure with a rubber band.
Wrap 2 more diapers around the sides and secure them with another rubber band.
Finish by wrapping ribbon around each tire and securing it with tape.
Step 4
Add Details
Wrap the cardboard strips with black felt to make Jeep rails and mirrors. Attach them to the box using duct tape.
Roll the baby bottles in a receiving blanket to form the headlights. Place 5 diapers vertically between the bottles to create the grill, and 3 horizontally underneath.
Add small bottles (like teething tablets) under the headlights as additional details.
Step 5
Attach the Tires
Thread ribbon through the tires and tie them around the hood and back of the Jeep.
For stability, place the Jeep on a paper-covered cardboard platform.
Step 6
Finishing Touches
Add Jeep-themed details like tire symbols, license plates, and a custom gift tag.
Load the back with baby products to create “Jeep cargo.”
Diaper Cake Decoration Ideas
Decorating your diaper cake is a fun way to make it stand out. Here are some creative diaper cake decoration ideas:
Add ribbons or fabric. Use wide, colorful, or patterned ribbons to tie the cake together. Layer thinner ribbons on top or use materials like lace or burlap for texture.
Incorporate flowers or greenery. Fresh or faux flowers and succulents can give your cake a natural or elegant look.
Themed cutouts. Attach paper cutouts like fairies, animals, or baby items to match the baby shower theme.
Top it with a plush toy or baby item. A stuffed animal, baby booties, or a cute rubber duck can make the perfect topper.
Seasonal touches. Add pumpkins in fall, winter snowflakes, or summer sunflowers for a seasonal theme.
Creative bases. Swap cardboard for a wood slice, mirrored tray, or gift box for a unique foundation.
Add functional gifts. For a practical yet stylish look, incorporate baby accessories like pacifiers, teething rings, or rolled-up bibs.
Light it up. Wrap battery-operated string lights around the tiers for a showstopping effect.
Keep it simple. A single-tier diaper cake with ribbon and a small topper can look just as beautiful.
No matter your theme, these ideas will help you create a memorable and personalized diaper cake that’s sure to impress!
